matplotlib.rc customizations for fonts

I’ve long struggled with modifying the fonts for matplotlib plots from the default “Bitstream Vera Sans” until I found this post recently.

The steps outlined there worked quite well for changing the general font used for the plots, but escaped math characters still would change to the default Computer Modern font. That font isn’t terrible and looks fine in the context of LaTeX documents, but it’s awkward to mix the fonts in a given figure. It turns out that it’s pretty easy to change all of the fonts used for the figures. The examples below show how to set the default font to Helvetica for all fonts, math or otherwise that will be used for the plot.

In ~/.matplotlib/matplotlibrc:


font.family : sans-serif

## Use Helvetica
font.sans-serif : Helvetica
mathtext.fontset : custom
font.size: 12
mathtext.rm : Helvetica
mathtext.it : Helvetica:italic
mathtext.bf : Helvetica:bold
mathtext.sf : Helvetica
mathtext.tt : Courier
mathtext.cal : Courier:italic

Note that I had to find the “Helvetica.dfont” file with the OSX “Font Book” app and generate the TrueType files with fondu as described in the blogpost above. To find the appropriate matplotlib fonts directory, I used

datapath=`python -c "import matplotlib; print matplotlib.rcParams['datapath']"`
cd ${datapath}/fonts/ttf

Some useful updates to the ~/.matplotlib/matplotlibrc file are shown below.


#backend : TkAgg
#backend : Macosx
backend : Qt4Agg
backend_fallback: True
interactive : True

legend.scatterpoints : 1
legend.fontsize : small
axes.titlesize : medium

image.interpolation : Nearest
## Heavier ticks & add minor ticks
xtick.minor.size : 3.0
xtick.major.size : 6.0
xtick.minor.width : 1.0
xtick.major.width : 1.0
xtick.minor.visible : True

ytick.minor.size : 3.0
ytick.major.size : 6.0
ytick.minor.width : 1.0
ytick.major.width : 1.0
## Square
figure.figsize : 6.0, 6.0

## font.sans-serif : #, Bitstream Vera Sans, Lucida Grande, Verdana, Geneva, Lucid, Arial, Helvetica, Avant Garde, sans-serif

font.family : sans-serif
## Use Calibri
font.sans-serif : Calibri
# Calibri needs a bit bigger
font.size: 13
mathtext.fontset : custom
mathtext.rm : Calibri
mathtext.it : Calibri:italic
mathtext.bf : Calibri:bold
mathtext.sf : Calibri
mathtext.tt : Courier
mathtext.cal : Courier:italic

## Use Helvetica
# font.sans-serif : Helvetica
# mathtext.fontset : custom
# font.size: 12
# mathtext.rm : Helvetica
# mathtext.it : Helvetica:italic
# mathtext.bf : Helvetica:bold
# mathtext.sf : Helvetica
# mathtext.tt : Courier
# mathtext.cal : Courier:italic

## Use Times
# font.family : serif
# font.serif : Times
# font.size: 12
# mathtext.fontset : custom
# mathtext.rm : Times
# mathtext.it : Times:italic
# mathtext.bf : Times:bold
# mathtext.sf : Times
# mathtext.tt : Courier
# mathtext.cal : Courier:italic</h3>
Posted in Tips, Uncategorized | Tagged , , | Leave a comment

Add border around text with matplotlib

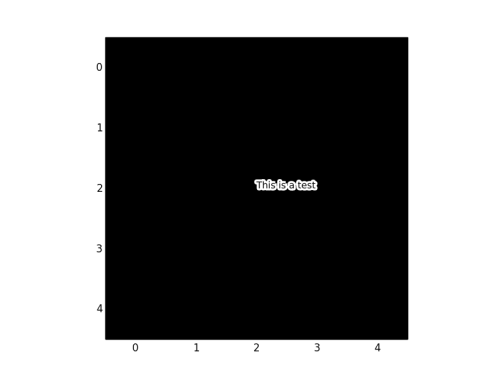
Sometimes text labels on plots can be hidden if there is too little contrast with a background color.  You can add borders to text objects (and probably most other patches) with “PathEffects“, see also http://matplotlib.org/examples/pylab_examples/patheffect_demo.html.

Below is an example:

import numpy as np
import matplotlib.pyplot as plt
import matplotlib.patheffects as PathEffects

plt.imshow(np.zeros((5,5), cmap=plt.gray())
txt = plt.text(2,2,'This is a test', size=11, color='black')
txt.set_path_effects([PathEffects.withStroke(linewidth=5, foreground='w')])
plt.draw()

textborder

Posted in Uncategorized | Leave a comment

Extract numerical data from a published graphic (matplotlib)

The ADS “Dexter” application (http://dexter.sourceforge.net/) allows you to extract quantitative data from old published graphics, or data from a graphic where an accompanying table was not provided with the numerical values plotted in the graphic. I wrote a simple script using Python/Matplotlib to do this for figure files saved to simple image formats (PNG, GIF, JPG, etc.). If you have a PDF or postscript version of the desired plot, you can take a screenshot of the figure (shift+⌘+4 on a Mac) to generate a file suitable for use with the script, which is provided here: https://github.com/gbrammer/FigureData.

edit: After I wrote this quick script, I found that there are some other suggestions on how to digitize figure data on astrobetter.

Posted in Uncategorized | Leave a comment

Rasterized graphics with Matplotlib to preserve plot transparencies for ApJ figures

Some of the astronomical research journals (ApJ, ApJL, others?) still require that figures be submitted in (encapsulated) postscript format. Since we’re otherwise living in the second decade of the 21st century, our figures frequently contain elements supported by the PDF format but not by PS, most notable among them variable element transparencies. This is the “alpha” parameter in Matplotlib, and I suppose “transparency” in more recent versions of IDL (IDL<=7 didn't support transparencies and was one of the main reasons I switched 4 years ago and for many other reasons happily never looked back).

Once I had carefully constructed PDF figures that I then needed to port to PS for submission to the journal I tried various image conversion options with ImageMagick/convert, always without much success. I learned recently that (of course) Matplotlib will easily allow you to do this at the plot generation stage with a trivial change to the plotting code. Example code is provided below with the key line obtained from pstjon@StackOverflow:

        import numpy as np
        import matplotlib.pyplot as plt
        
        x = np.random.normal(size=5000)
        y = np.random.normal(size=5000)
        #### Normal plot
        plt.scatter(x, y, alpha=0.05, s=40, color='black')
        plt.plot([-10,10],[-10,10], color='red', linewidth=10, alpha=0.5)
        plt.plot([-10,10],[10,-10], color='blue', linewidth=10, alpha=0.5)
        plt.xlim(-10,10); plt.ylim(-10,10)
        plt.savefig('default.pdf')  ### alphas preserved
        plt.savefig('default.eps')  ### alphas lost
        
        #### For rasterized EPS (e.g., preserve opacity)
        fig = plt.figure()
        ax = fig.add_subplot(111)
        ## This is the key.  elements with zorder < 1 will be rasterized
        ax.set_rasterization_zorder(1) 
        
        ax.text(0, 5, 'This will be rasterized', size=12, zorder=0)    
        ax.text(0, 3, 'This won\'t', size=12, zorder=1)    

        ax.scatter(x, y, alpha=0.05, s=40, color='black', zorder=0)
        ax.plot([-10,10],[-10,10], color='red', linewidth=10, alpha=0.5,
                zorder=0)
        ax.plot([-10,10],[10,-10], color='blue', linewidth=10, alpha=0.5, 
                zorder=0)
        ax.set_xlim(-10,10); ax.set_ylim(-10,10)
                 
        plt.xlim(-10,10); plt.ylim(-10,10)
        fig.savefig('raster.eps', rasterized=True)
        fig.savefig('raster300.eps', rasterized=True, dpi=300) ### for publication

The results are compared in the image below.

Matplotlib_raster.002

This was partially inspired by a recent post at Astrobetter showing how to use rasterization to reduce figure file sizes when plotting many thousands of points. In the example shown there, I think the plot is still useless as the large majority of points are in the saturated blob in the middle of the image. The Astrobetter example (along with mine above) is just a toy demonstration, but this problem does appear up frequently in the published literature. This can be cured either by pushing alpha down further or, better yet, by showing contours rather than points where the point density is high.

Posted in Uncategorized | Leave a comment

Install SCAMP

I received a new laptop that already had many things precompiled and installed, like SExtractor. The unix libraries are an ugly mix of macports in /sw/ and my own homebrew installations described as in some of the posts below. I had some trouble installing SCAMP from source, with similar FFTW errors that show up when trying to install SExtractor:


checking /usr/local/share/fftw-3.3.3/build-single/include/fftw3.h usability... yes
checking /usr/local/share/fftw-3.3.3/build-single/include/fftw3.h presence... yes
checking for /usr/local/share/fftw-3.3.3/build-single/include/fftw3.h... yes
checking for fftwf_execute in -lfftw3f... no
configure: error: FFTW single precision library files not found in /usr/local/share/fftw-3.3.3/build-single/! Exiting.

Build a sandboxed FFTW:

cd /usr/local/share
wget http://www.fftw.org/fftw-3.3.3.tar.gz
tar xzvf fftw-3.3.3.tar.gz
cd fftw-3.3.3
./configure --prefix=/usr/local/share/fftw-3.3.3/build-single --enable-float --enable-threads
make 
make install

Build SCAMP

cd /usr/local/share
wget http://www.astromatic.net/download/scamp/scamp-1.7.0.tar.gz
tar xzvf scamp-1.7.0.tar.gz
cd scamp-1.7.0./
configure --with-fftw=/usr/local/share/fftw-3.3.3/build-single/lib --with-fftw-incdir=/usr/local/share/fftw-3.3.3/build-single/include  --with-plplot=/sw/ --with-plplot-incdir=/sw/include/plplot/ --with-atlas=/sw/ --enable-threads --enable-static
make 
make install
Posted in Uncategorized | Leave a comment

Replace laptop DVD drive with a solid state drive

This idea comes courtesy of a colleague of mine and falls squarely in the category of “wish I’d thought of that a long time ago.” HDs and astronomical detector formats appear to grow at about the same rate, so there’s never any problem filling a laptop disk. I’ve been struggling to survive on my last 10 Gb for months now. So here’s a simple way to buy a little time: replace the DVD drive that you never use with a second hard drive.

I got this 256 Gb solid state drive as the replacement. Also necessary is a drive “caddy” so the small drive will fit in the spot vacated by the DVD drive. This one worked fine for my mid-2010 13″ MacBook Pro. Finally, here are simple instructions on how to open everything up (getting the appropriate screw driver also was helpful).

That was it for getting the drive installed. I opted not to bother installing the operating system on the new drive, which people recommend for really taking advantage of the speed of the solid state drive [in which case you’d also probably put the new drive where the original disk was and then put that one in the DVD space].

I also took advantage of the case being open to upgrade to 8 Gb of memory. Is there really a good reason why Chrome/Firefox/Safari quickly need upwards of 1 Gb of memory to run gmail and a few tabs?

Posted in Uncategorized | Leave a comment

Homebrew python: default interactive plotting with Matplotlib

One thing I noticed with my homebrew installation of matplotlib was that the interactive plotting was disabled by default. Turning it on was a simple matter of finding and editing the matplotlibrc file:

$ ipython
In [1]: import matplotlib as mpl

In [2]: mpl.matplotlib_fname()
Out[2]: '/usr/local/Cellar/python/2.7.2/lib/python2.7/site-packages/matplotlib-1.1.0-py2.7-macosx-10.4-x86_64.egg/matplotlib/mpl-data/matplotlibrc'

In [3]: !vi /usr/local/Cellar/python/2.7.2/lib/python2.7/site-packages/matplotlib-1.1.0-py2.7-macosx-10.4-x86_64.egg/matplotlib/mpl-data/matplotlibrc

I set the following lines:

# backend : MacOSX
backend : TkAgg
[...]
backend_fallback: True
[...]
interactive : True

Posted in Tips | Tagged | Leave a comment

Python setup with HomeBrew

HomeBrew offers a nice way of installing a Python distribution with a single command.  As usual, it puts the files releated to the installation in /usr/local/Cellar and symlinks the necessary things to /usr/local/[bin/lib/include], but it also is a bit more careful about the site-packages directory so that it and anything you install yourself doesn’t get removed if you upgrade the HomeBrew Python distribution, as described here: https://github.com/mxcl/homebrew/wiki/Homebrew-and-Python.  The result is that pip and easy_install put things in /usr/local/lib/python2.7/site-packages/.

To install:

brew install python

As described in the link above, to be able to use the HomeBrew pip and easy_install, you have to modify your PATH variable as follows, perhaps in ~/.bashrc:

export PATH="/usr/local/bin:/usr/local/share/python:${PATH}"

Numpy, Scipy, Matplotlib

These commonly-used python modules can be easily installed with the new HomeBrew Python installation.  Installing Numpy and Scipy is described here, and detailed below.

## Go to a directory where the downloaded files can be placed
cd /usr/local/src
## Download the module distributions
git clone https://github.com/numpy/numpy.git
git clone https://github.com/scipy/scipy.git

I had to add the following commands needed to get the compiler flags correct with gfortran and gcc, otherwise some of the fortran libraries were being complied with “i386” architecture and though the modules would appear to be installed correctly, Python would complain later with errors like “mach-o, but wrong architecture because the library was compiled with i386”.

export MACOSX_DEPLOYMENT_TARGET=10.6
ARCH="-arch x86_64"
export CFLAGS="${ARCH}"
export FFLAGS="-static -ff2c ${ARCH}"
export LDFLAGS="-Wall -undefined dynamic_lookup -bundle ${ARCH}"

cd /usr/local/src/numpy
python setup.py build
python setup.py install

cd ../scipy
python setup.py build
python setup.py install

Other useful modules appeared to install simply with pip:

pip install ipython
pip install matplotlib
pip install pyfits
pip install sphinx
pip install cython

The result of this is a fresh, clean Python installation that can easily be upgraded and that is easy to install additional modules. I’m still using the STSCI_PYTHON distribution for other things, as I didn’t figure out what would be necessary to plug IRAF and PyRAF into the HomeBrew distribution of python. The two are kept separate by the fact that STSCI_PYTHON is all run in csh, setting all of the necessary environment path variables when you invoke that shell.

I noticed in the HomeBrew installation that there was a newer IPython version (0.12) than the version installed with STSCI_PYTHON (0.10). I used pip to upgrade the STSCI_PYTHON IPython as follows:

$ csh
% pip install --upgrade ipython

However then starting ipython in csh resulted in a rather terrifying error:

Traceback (most recent call last):
  File "/usr/stsci/pyssg/Python-2.7/bin/ipython", line 9, in 
    load_entry_point('ipython==0.12.1', 'console_scripts', 'ipython')()
  File "/usr/stsci/pyssg/2.7/distribute-0.6.10-py2.7.egg/pkg_resources.py", line 299, in load_entry_point
    return get_distribution(dist).load_entry_point(group, name)
  File "/usr/stsci/pyssg/2.7/distribute-0.6.10-py2.7.egg/pkg_resources.py", line 2229, in load_entry_point
    return ep.load()
  File "/usr/stsci/pyssg/2.7/distribute-0.6.10-py2.7.egg/pkg_resources.py", line 1948, in load
    entry = __import__(self.module_name, globals(),globals(), ['__name__'])
ImportError: No module named terminal.ipapp

This resulted from the fact that the old IPython was still sitting around and conflicting with the upgrade. Removing the old version from the path as follows solved the problem:

cd /usr/stsci/pyssg/2.7
sudo mv IPython IPython.10 ## don't remove, just change the path

UPDATE! The above fix allowed me to start IPython with the STSCI_PYTHON, but now “pyraf –ipython” is broken. Be wary of updating the modules piecemeal within the STSCI_PYTHON distribution as some are customized for wrapping the “RAF” part of PyRAF.

UPDATE#2: Easily reverted to ipython-0.10 with

sudo pip install http://pypi.python.org/packages/source/i/ipython/ipython-0.10.tar.gz

and “pyraf –ipython” now appears to work as before.

Posted in Uncategorized | 2 Comments

Switch from MacPorts to HomeBrew

Homebrew appears to be a nice replacement for MacPorts for installing unix applications not provided by Apple. It puts installed libraries in their own folders in /usr/local/Cellar/ and then sym-links the executables to /usr/local/bin/. It also appears to provide a nice way of keeping Python 2.X up-to-date, but I haven’t tried that yet.

Install Homebrew:

/usr/bin/ruby -e "$(/usr/bin/curl -fksSL https://raw.github.com/mxcl/homebrew/master/Library/Contributions/install_homebrew.rb)"

To remove the installed macports, I first just mv the macports directory to a dummy name so that the macports won’t be found in the PATH but that they can easily be reinstated if any problems with homebrew arise:

sudo mv /opt/local /opt/local_macports

If you used the “tar” trick described below to install replace the Mac tar, you need to first revert to the old tar and then use homebrew to re-install gnu-tar:

sudo ln -sf /usr/bin/mactar /usr/bin/tar
brew install gnu-tar
sudo ln -sf /usr/local/bin/gtar /usr/bin/tar

Some useful initial homebrew libraries:

brew install wget
brew install imagemagick
brew install fftw
brew install cfitsio
brew install gnuplot
Posted in install, Tips | Tagged , | 6 Comments

Install PyMC on OSX, Python2.7

I came across a number of compile problems when trying to install PyMC with the latest STSCI_PYTHON and Python2.7. The main problem appears to stem from the version of gfortran that the install scripts found in /sw/bin, perhaps shipped with Apple developer tools. I found a fix by forcing /usr/local/bin/gfortran, which you can obtain from HERE.

cd /sw/bin
sudo mv gfortran gfortran-xx

Then to install:

cd /usr/local/share/  ### place to store downloaded source code

### Get source from http://pypi.python.org/pypi/pymc/
wget http://pypi.python.org/packages/source/p/pymc/pymc-2.1beta.zip
unzip pymc-2.1beta.zip
cd pymc-2.1beta

csh  ### Hack to use the STSCI_PYTHON environment variables
bash  

export F77=/usr/local/bin/gfortran   ### Make sure to use the correct gfortran
ARCH="-arch x86_64"                  ### The following seem to be necessary for building PyMC with setup.py
export MACOSX_DEPLOYMENT_TARGET=10.6
export CFLAGS="${ARCH}"
export FFLAGS="-static -ff2c ${ARCH}"
export LDFLAGS="-Wall -undefined dynamic_lookup -bundle ${ARCH}"

### Run the build script
rm -rf build
python setup.py config_fc --fcompiler gfortran build

### Put it somewhere in PYTHONPATH
sudo cp -R build/lib.macosx-10.6-x86_64-2.7/pymc /usr/stsci/pyssgx/Python-2.7/lib/python2.7/site-packages/

Without the “-arch” commands above that force 64-bit compilation with x86_64, Python2.7 chokes with an error like:
/usr/stsci/pyssgx/Python-2.7/lib/python2.7/site-packages/pymc/flib.so: mach-o, but wrong architecture because the library was compiled with i386, e.g.:

lipo -info /usr/stsci/pyssgx/Python-2.7/lib/python2.7/site-packages/pymc/flib.so
Non-fat file: /usr/stsci/pyssgx/Python-2.7/lib/python2.7/site-packages/pymc/flib.so is architecture: i386

Finally, test it with the simple example script listed at http://github.com/pymc-devs/pymc .

Posted in install, Tips, Uncategorized | Tagged , , | Leave a comment